Skip to content

commercial lighting breakdown – nerdio

commercial

client: nerdio   agency: small hill films
dir/writer: AJ Campli   dp: Bailey T. Miclette
1st ac: Dustin Wheeler   2nd ac: Riley Clinton
gaffer:
Tyler Trepod   key grip: Teej Morgan
pa: Deanna Schaekel   color: Jonny Sirotek
VFX: Casey Webster

select frames
youtube video

Director AJ Campli and DP Bailey Miclette are repeating clients of mine, so I was thrilled when they called me to light this comedic IT commercial.

A quick pre-production phone call later, and I was in tune with their vision, had my equipment list, and was ready for set day!

Let’s walk through how I collaborated with the team to bring their vision to life.

room 1 breakdown
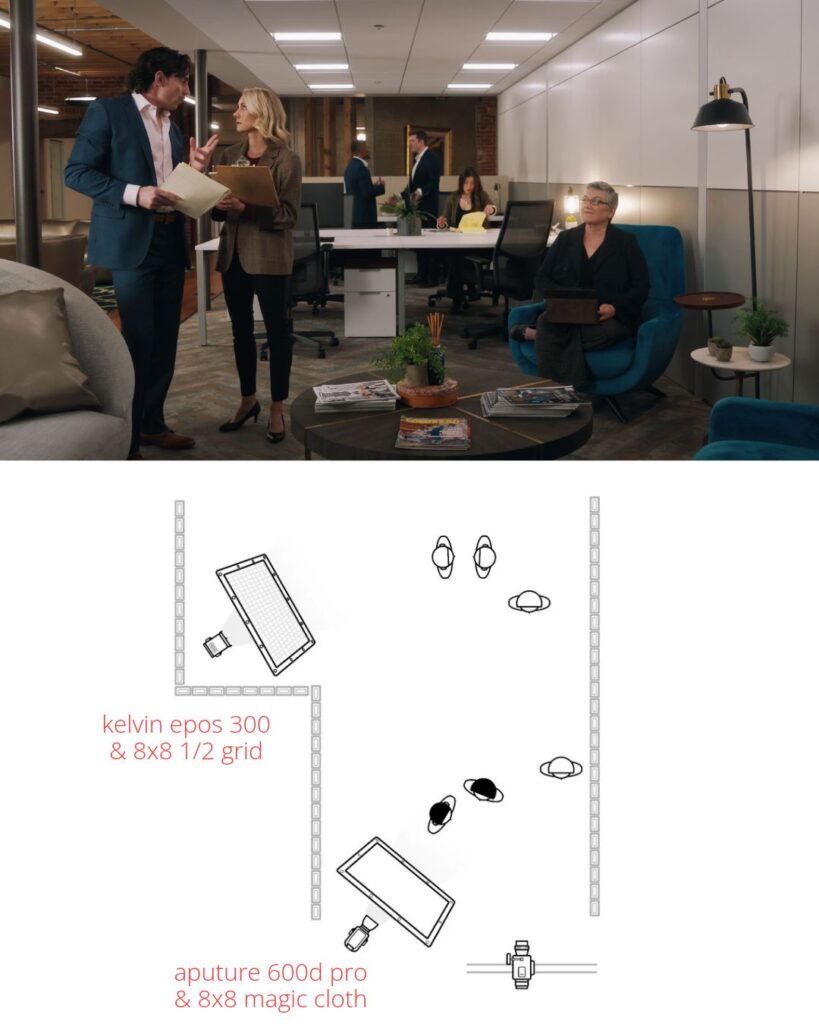
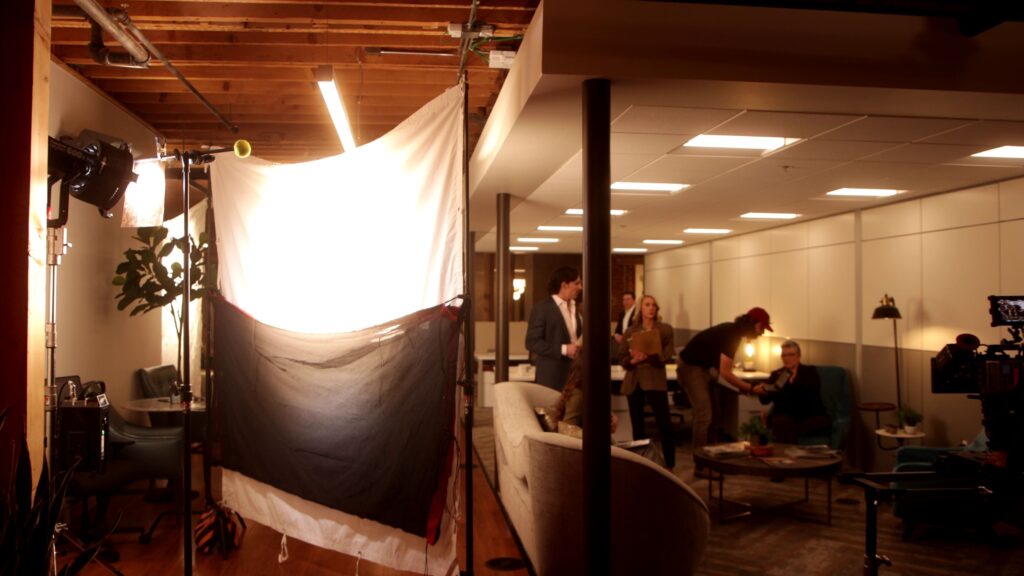
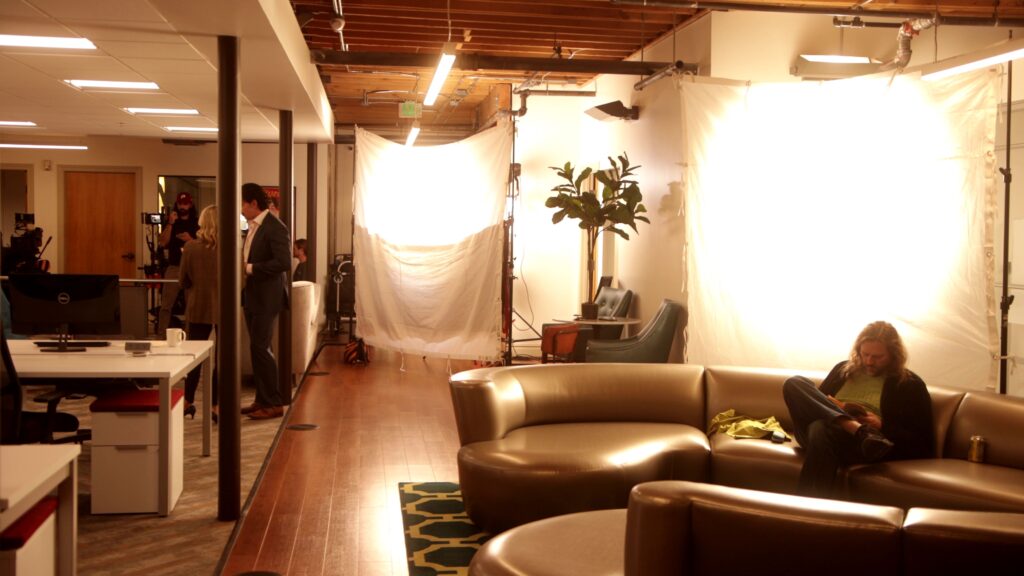
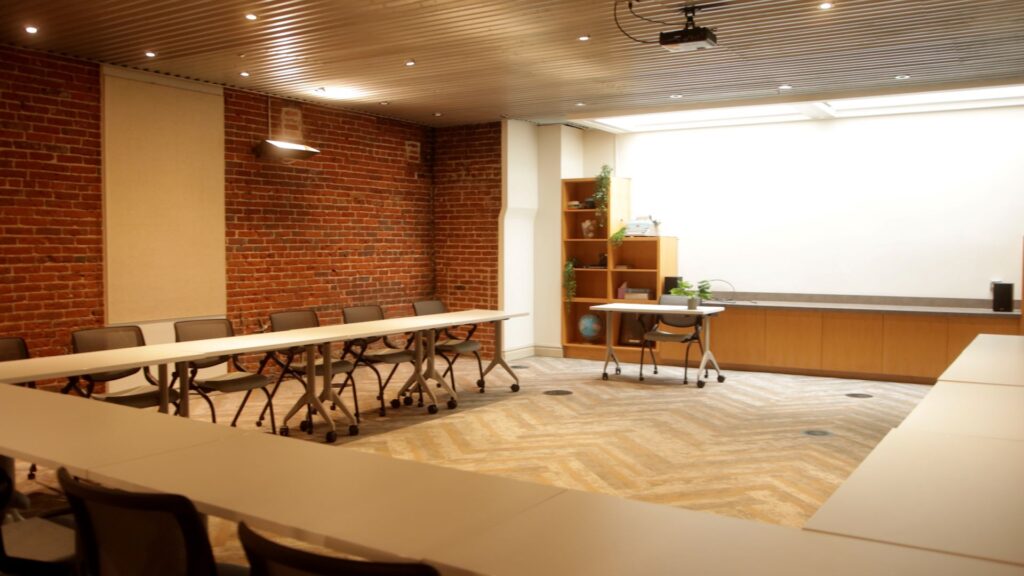
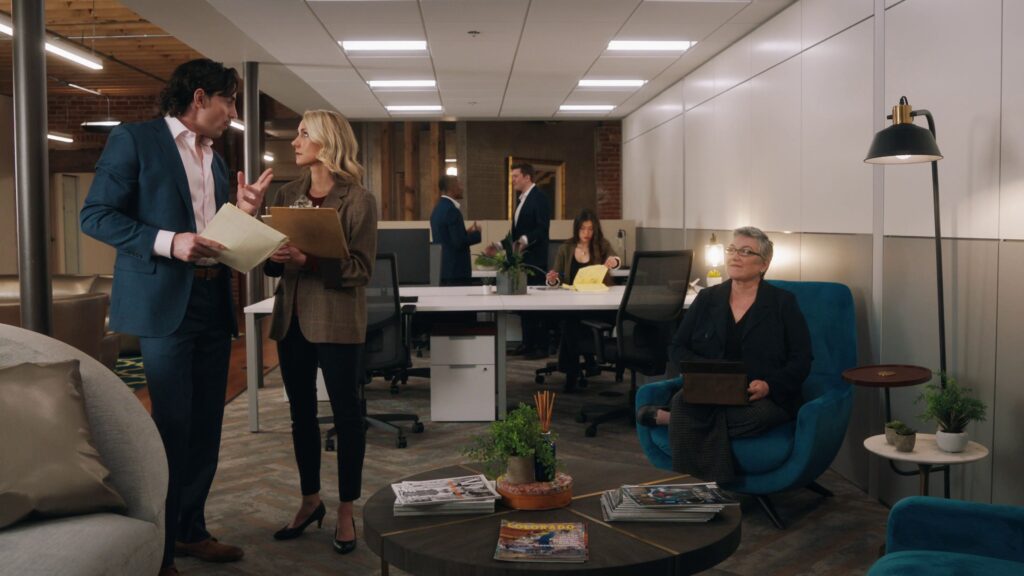
The intro shot was a wide of the whole office space, which didn’t give me any place to hide lights in frame. So I decided to apply the ole’ adage, “Sometimes the best way to make it look like a grocery store, is to leave it lit like a grocery store”, and used the installed overhead lighting and available practicals to fill out the frame.
 
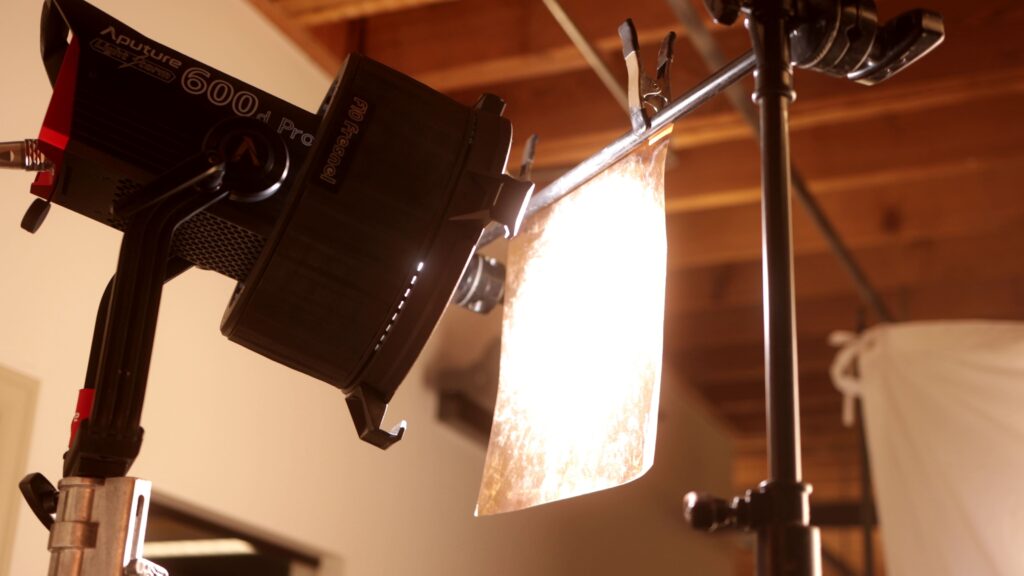
To accent the office lighting and give *some* shape to the talent in the foreground, an 8×8 magic cloth was placed just out of frame on camera left, with an Aputure 600d Pro pushing through that.
A double net was folded in half and clipped to the bottom half of the 8×8 magic cloth. I did this to reduce the intensity of the back of the couch in the foreground. Without the double net, the back of the couch would have looked “sourcey”, and given away where the key light was located.
 
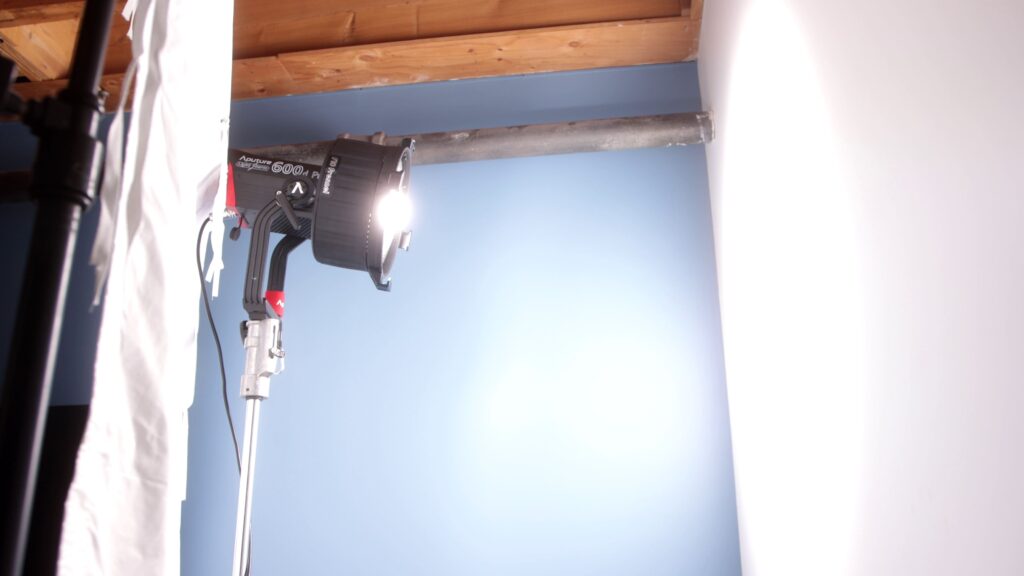
The 600d was pushed through a CTO gel. This brought the color temperature of it closer to the office lighting. Rather than clip the gel directly to the fresnel, I clipped it to a horizontal c-stand arm with some space between the lens of the fresnel and the gel.
The distance helps reduce the heat impact on the gel from the light, and having air on both sides rather than having it tight against the fresnel lens also helps to cool the gel off and keep it from melting.
 
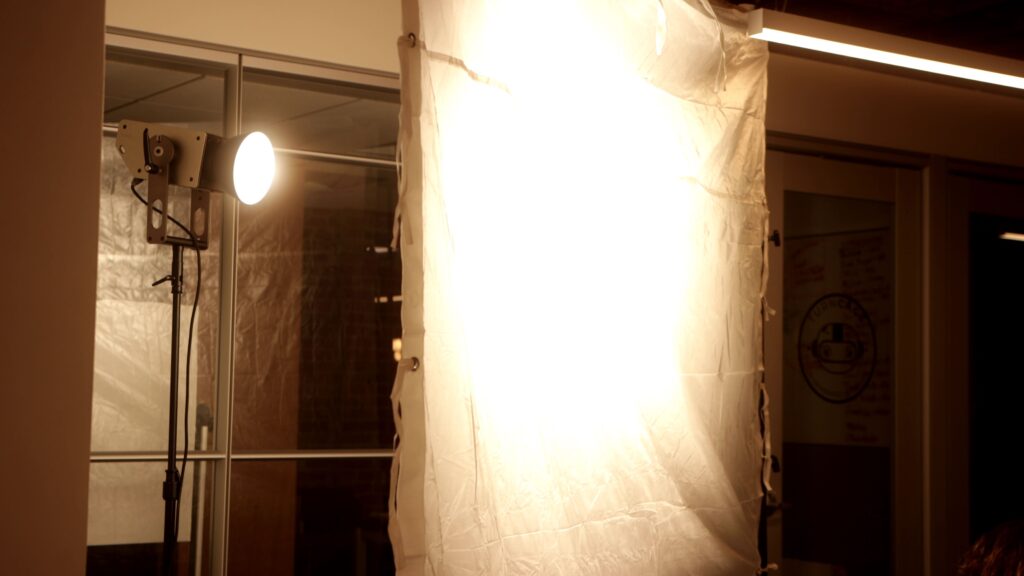
In the back of the room, a Kelvin EPOS 300 was pushed through an 8×8 half-grid to help highlight the background talent. I chose half-grid because it’s about a stop brighter than magic cloth. With the wattage of the Kelvin EPOS 300 being half that of the Aputure 600d, a one-stop difference in diffusion brings them to be *about equal* in terms of measured output. And because it’s the back of the room, the reduction in softness won’t be noticeable to the viewer.
The intensities of each light were adjusted until they felt proper for the space, and that was about that! A pretty simple setup for the first shot of the commercial!
 
This setup also happened to be the same look as the last shot, so we filmed that too since we were already lit. The closing shot just required us to reposition the camera for a different dolly movement!

room 2 breakdown

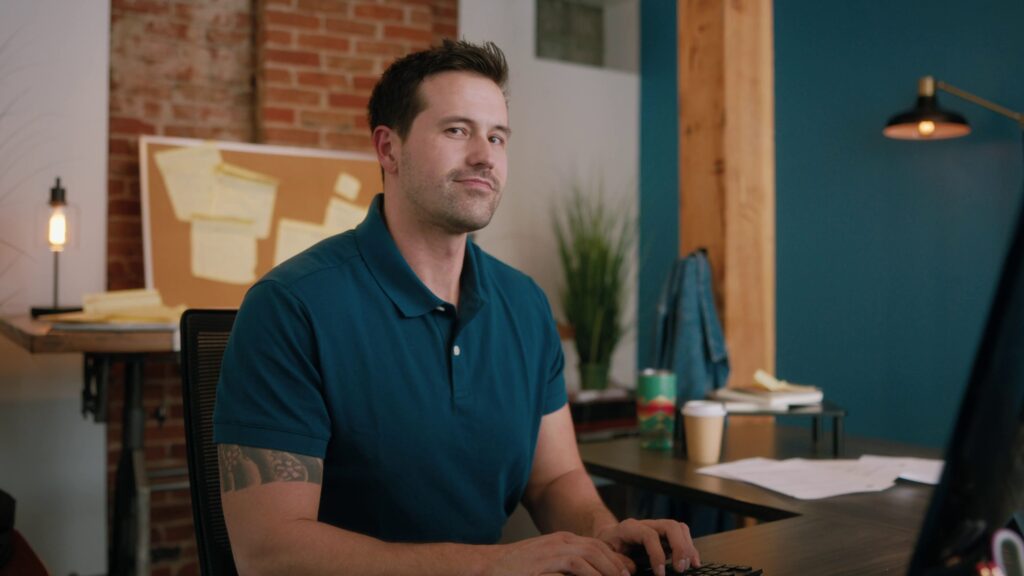
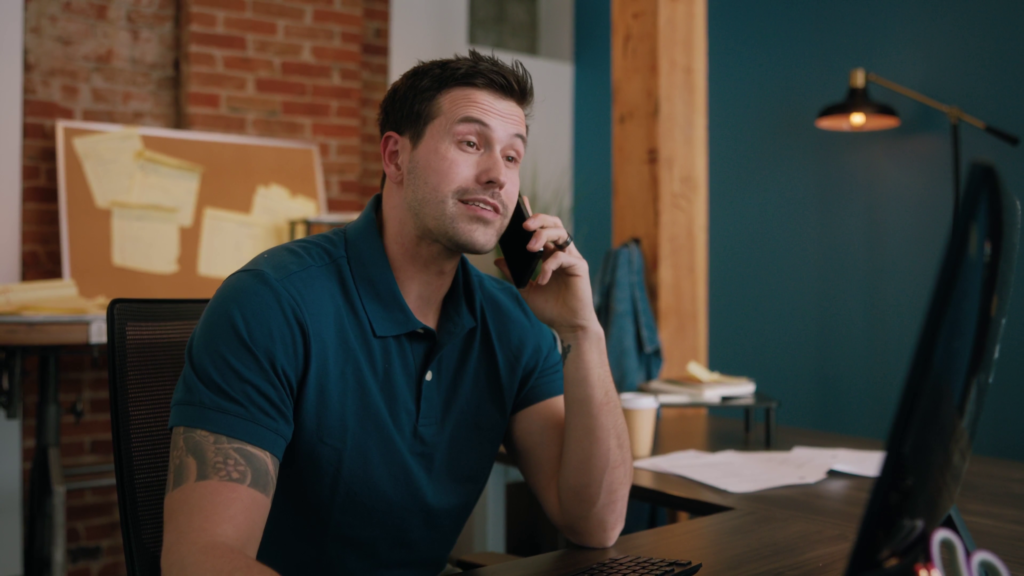
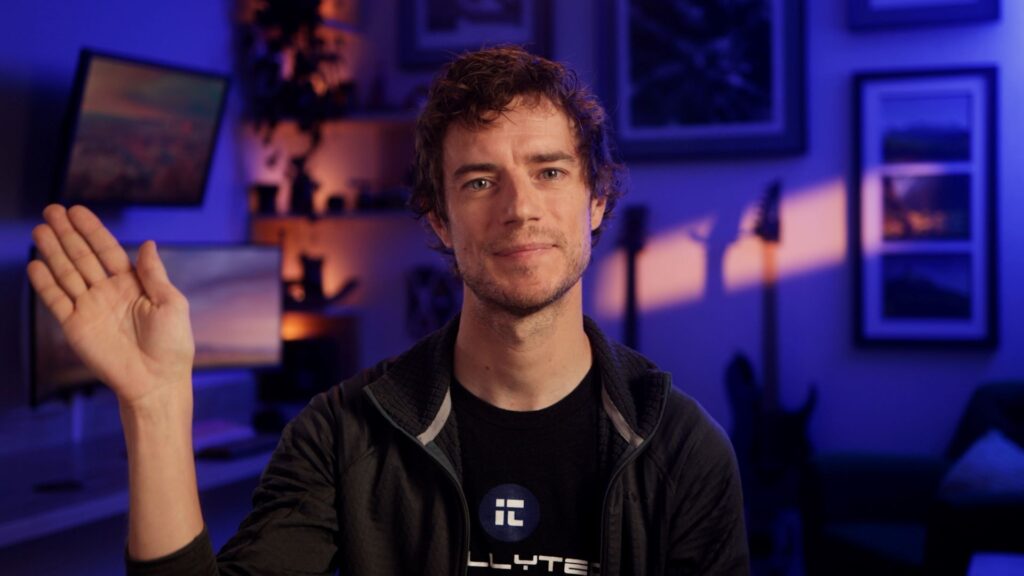
Let’s move onto the hero shot of our IT guy. This was a cramped room that required some special considerations to get a soft, ambient-feeling light quality.
 
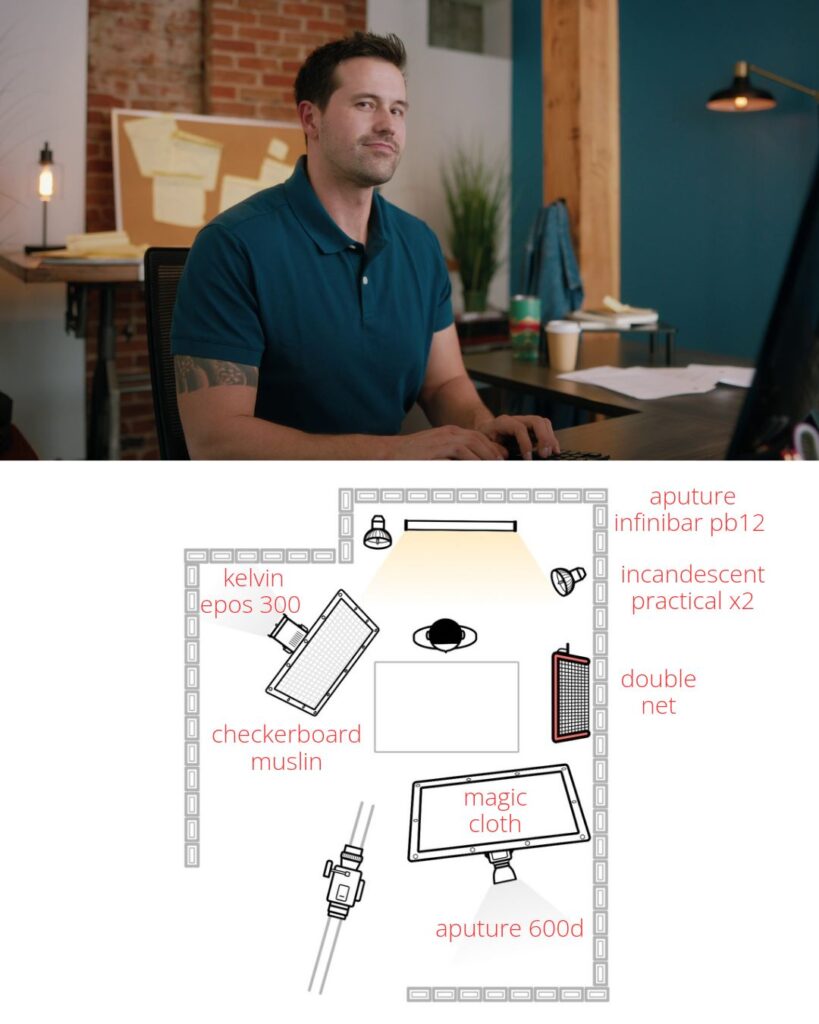
Let’s start with the key light. In order to maximize the softness of this light, I decided to make it a book light. To do that, I bounced the Aputure 600d off the white office wall and back through an 8×8 magic cloth, which created a soft source with a reduced falloff intensity.
Now, just because I used an 8×8 doesn’t mean the source doesn’t follow the inverse square law. But if you watched my previous video on cinematic interview setups, you’d have seen this graph, specifically this part, and this is why I chose an 8×8 over a 6×6. I needed to reduce sourciness in a small space. If this doesn’t make sense, feel free to click here to get caught up to speed!
 
A double-net was folded in half and taped against the wall in front of the 8×8. This helped to cut down the intensity of the wall, which hides the source of the light to the camera.
 
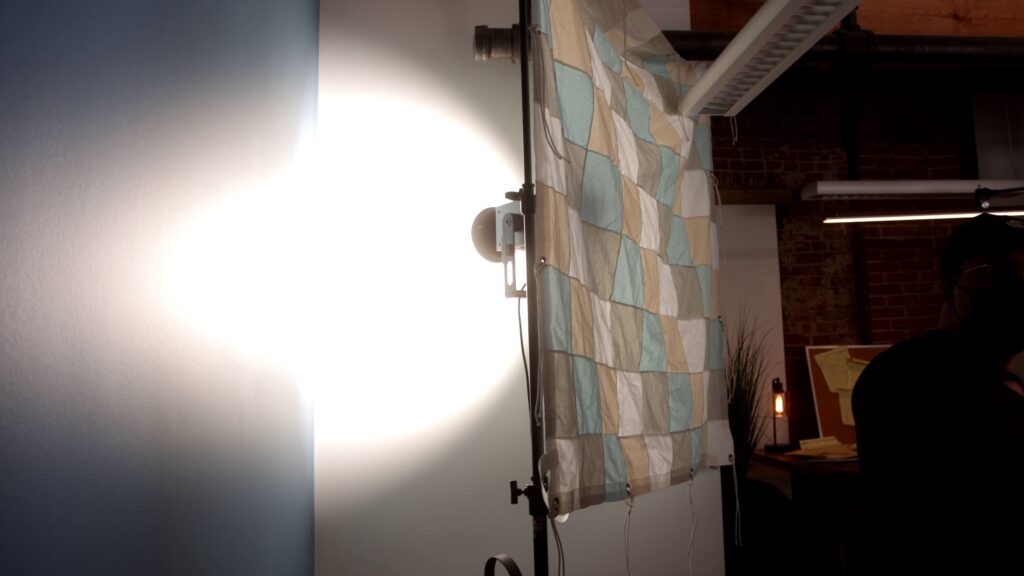
To help control the ratio between the light and shadow sides of our talent, I added another booklight on the fill side. Bouncing a Kelvin EPOS 300 off the wall and back through a checkerboard muslin gave us the soft, directionless fill we were going for.
Side note: I’m a big fan of this checkerboard muslin from the Grip House. It has a warming effect on a daylight balanced light that I prefer on lighter skin tones, from 5600 kelvin to about 5000 kelvin.
 
It also more accurately simulates light bouncing in from the exterior environment than a regular rag. Light isn’t just coming straight into an office building from the sun. It’s also bouncing off buildings, the concrete, trees, coming in from the clouds, etc. A checkerboard muslin helps re-create this effect by piecing together several types of muslin into one cloth.
 
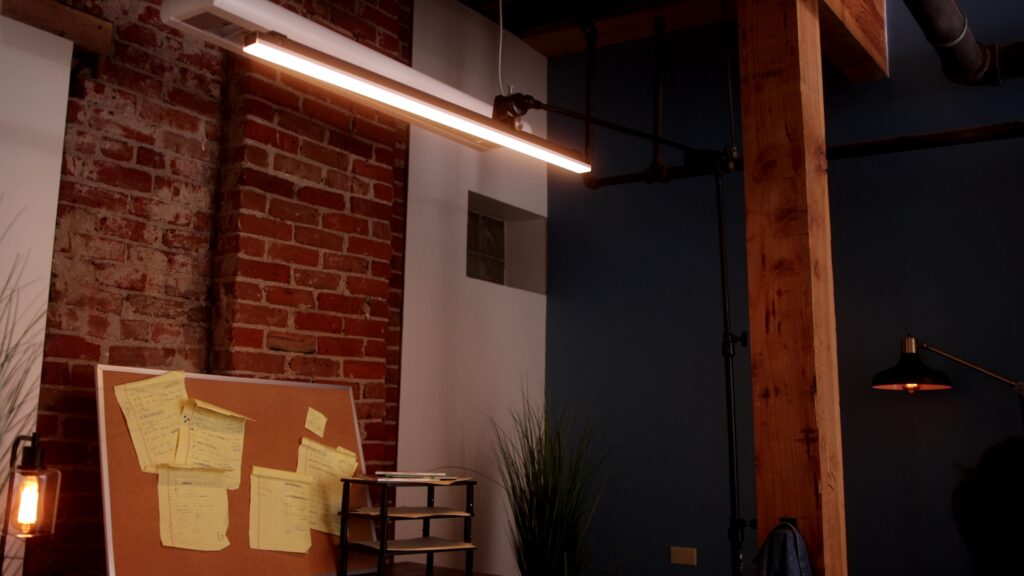
For the last film light in this scene, I boomed in an Aputure Infinibar PB12 behind the talent. This gave some separation between him and the background. A piece of tape along the back of the tube light keeps it from spilling onto the wall, and the wooden pillar here helped hide the stand from camera. Love when that happens!
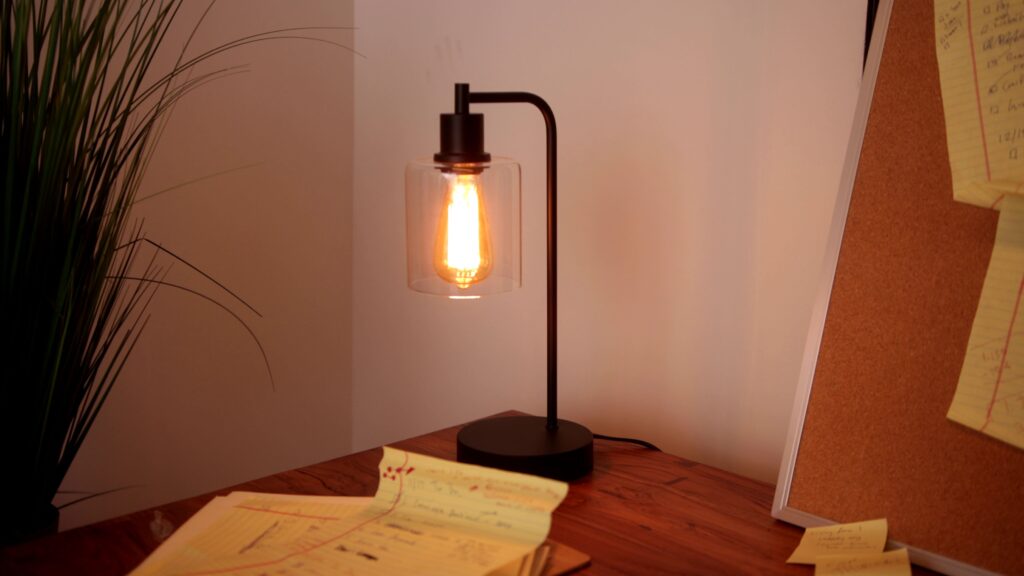
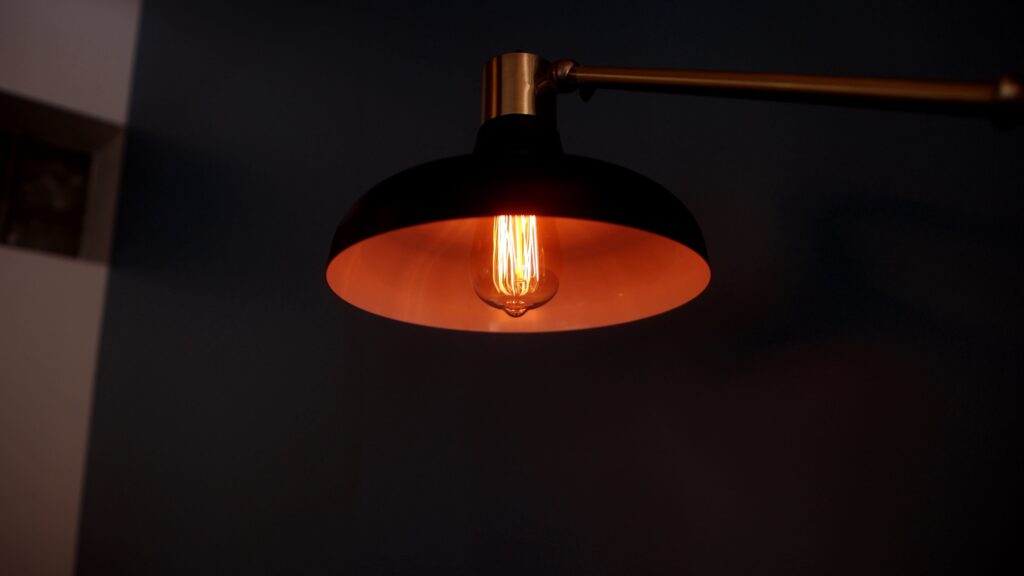
In order to provide motivation for the Infinibar rim light, I placed some tungsten practicals in frame. These were controlled by 300W dimmers to achieve the preferred intensity level. I always keep a set of incandescent practicals handy for things like this. Without diving into it too much, the color output of them is richer because of the full spectral output of a tungsten unit compared to an LED.
That does it for this scene! Pretty much a standard 3-point lightning setup with a few tweaks.

quick cuts breakdown

Let’s move onto the quick cut shots. These clips were all about careful positioning of the key light on our talent to avoid being seen in the camera whip. The setup time for these three scenes was also fairly minimal, so the lighting reflects that!

quick cut #1
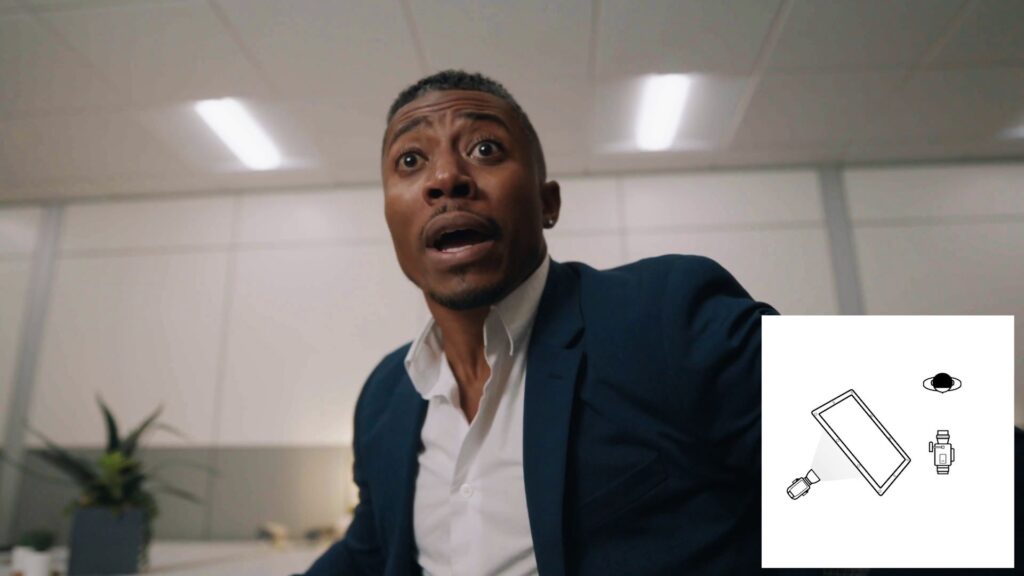
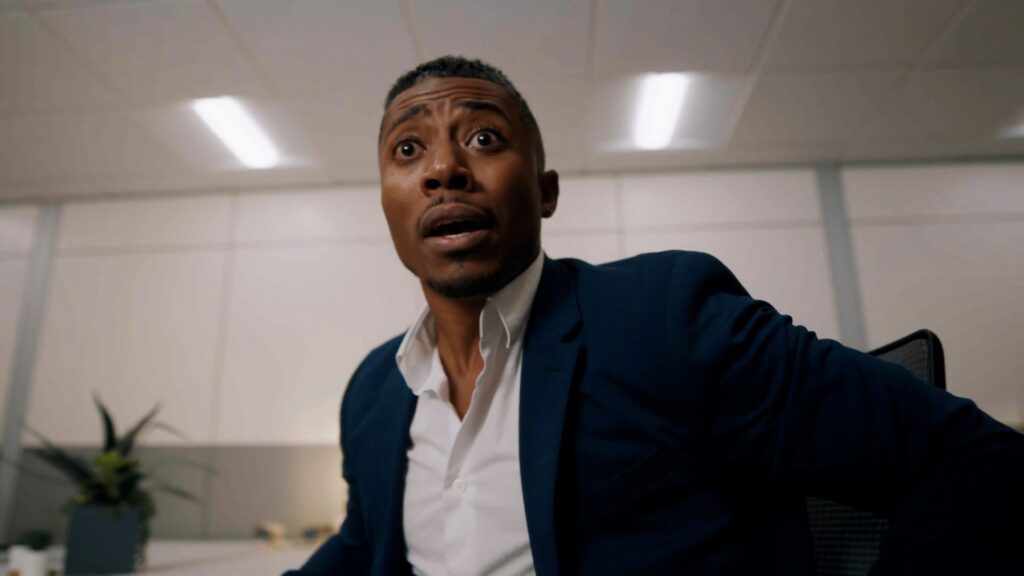
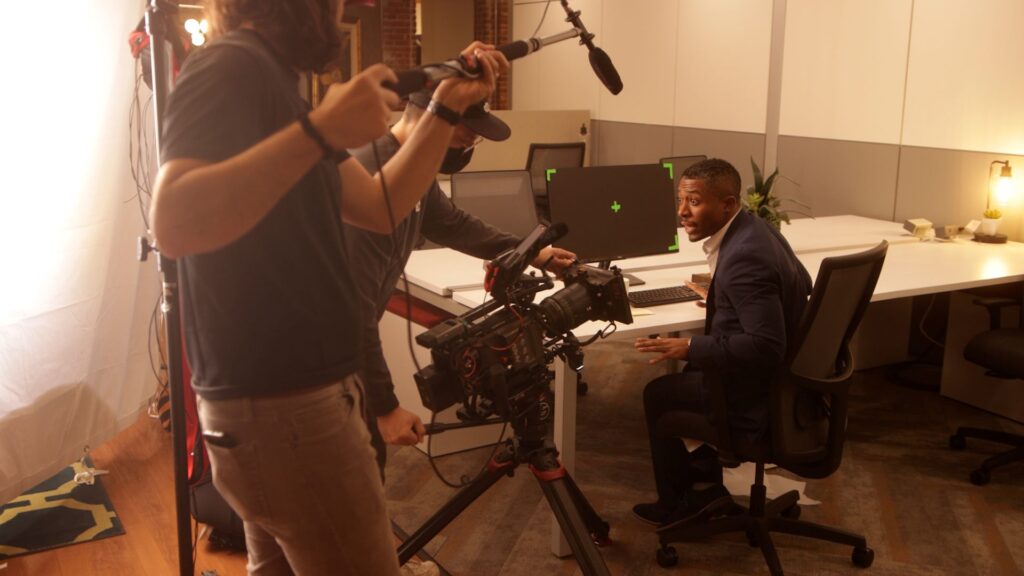
We filmed this shot right after our large office scene, so I re-positioned the Aputure 600d Pro, 8×8 magic cloth, and double net. These were placed as a far side key, or across our talents eye line from the camera. I placed the setup at a pretty typical 3/4 angle to give some shape to the face without being too dramatic with it. Positioning camera left also gave the DP room to whip pan camera right.
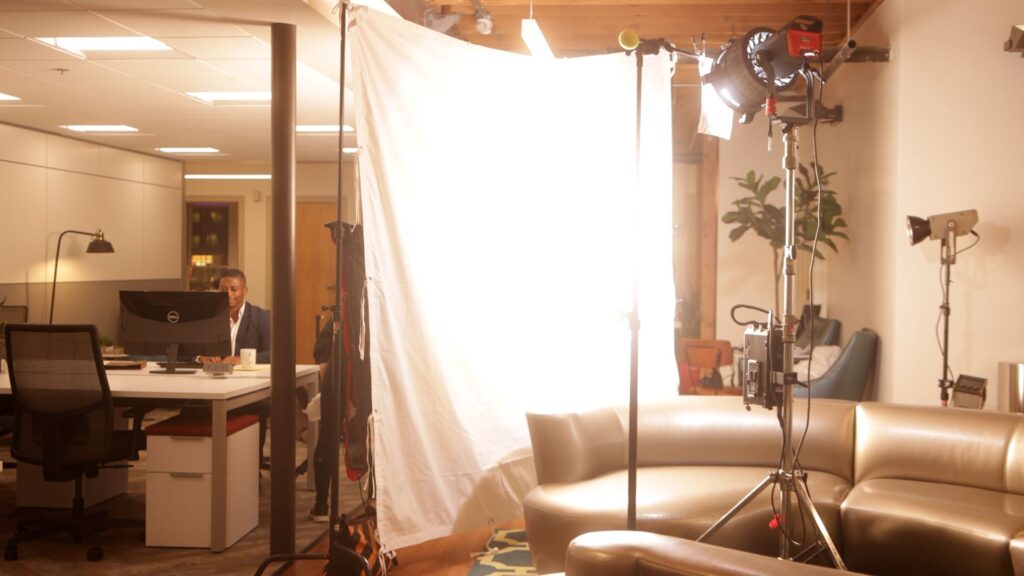
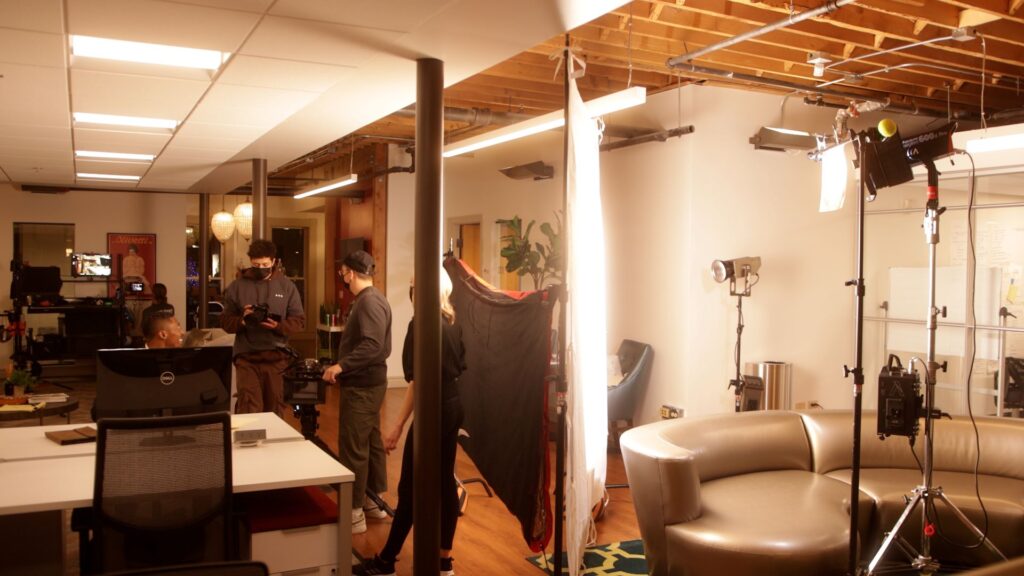
Since we were looking up at our talent, there wouldn’t be any room to hide lighting behind him in frame, so I went with available lighting again to fill out the rest of the frame.
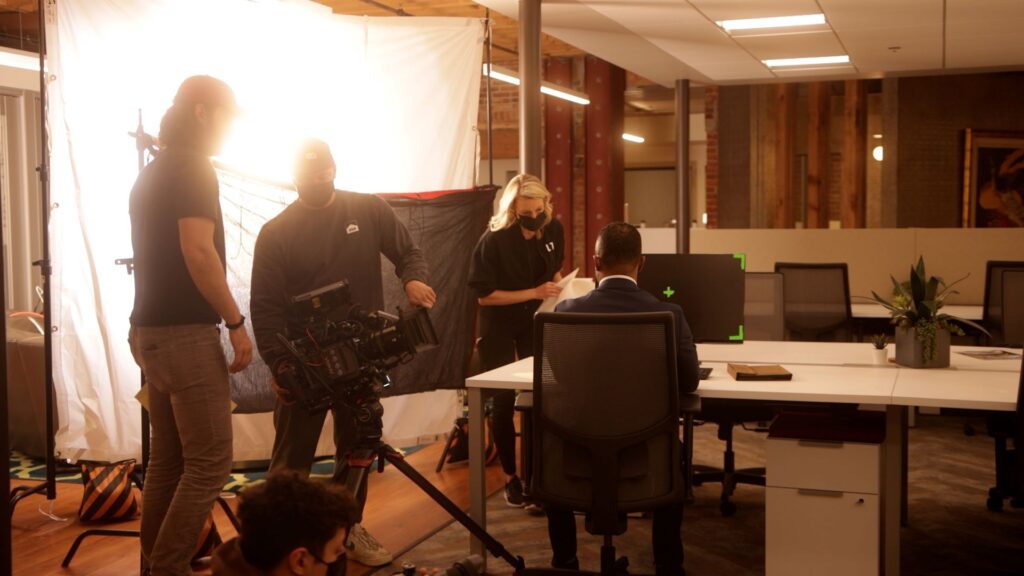
The green tape that you can see here on the monitor is for the VFX work that needed to be done in post. The tape gives the graphic artist a triangulated plane so they can add in the monitor replacement!
quick cut #2
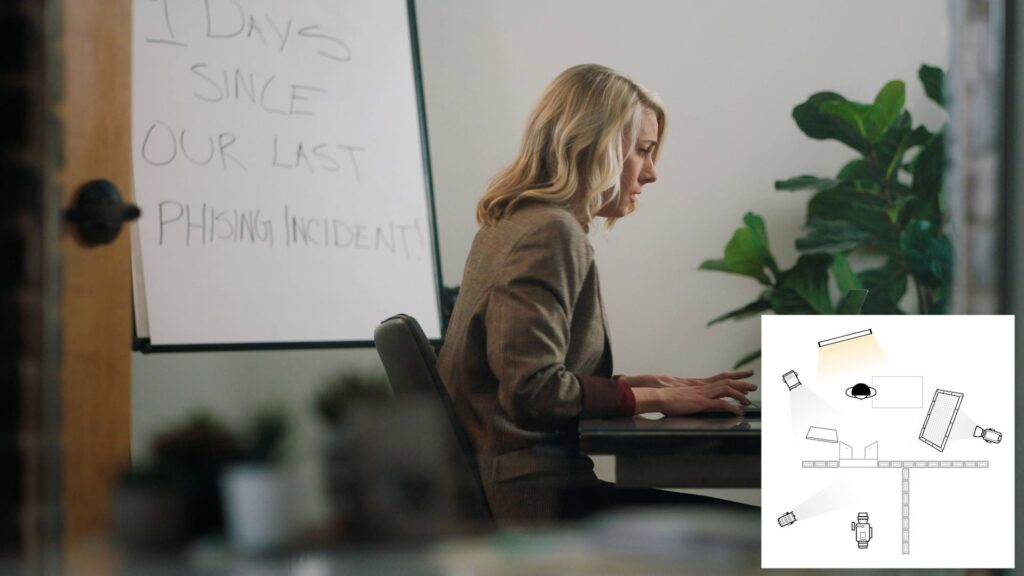
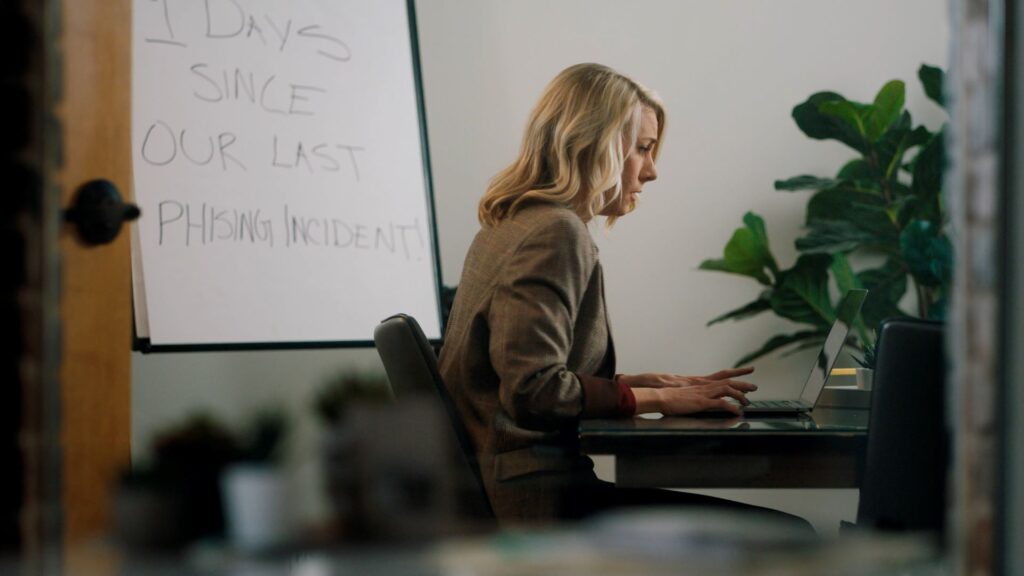
The DP wanted the eye line of this shot to be opposite the last one so we weren’t looking the same way for all 3 of these shots. So, the 600d and checkerboard muslin were positioned on the far side of the talent to act as the key light.
But, this placement also meant the camera whip would have looked directly at the key. In order to solve this issue, the camera was positioned outside the room, behind a little window. An Aputure 60x helped keep that outside wall from being too dark.
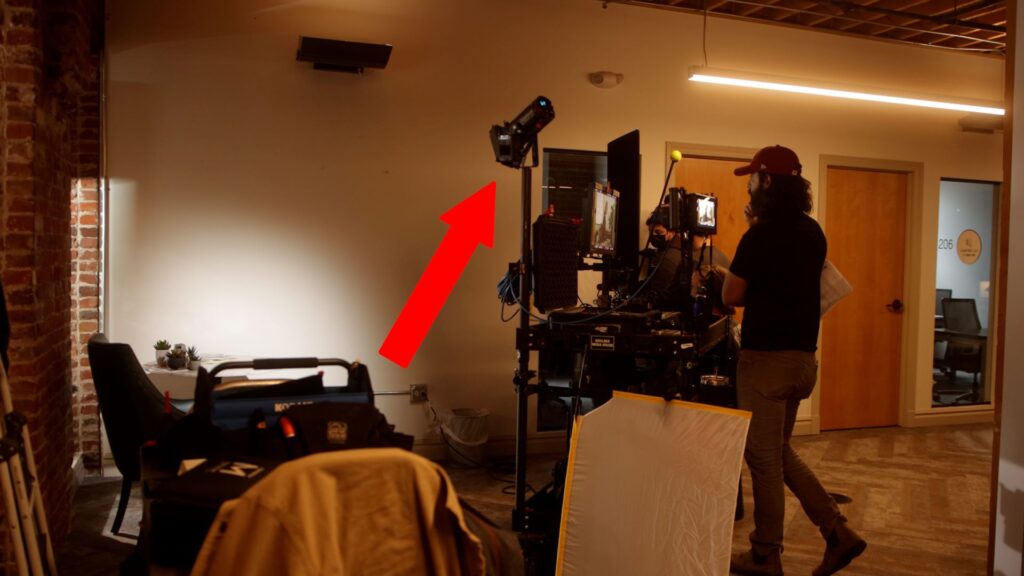
Back inside the room, an Aputure Infinibar PB12 positioned behind the talent gives her some separation from the background.
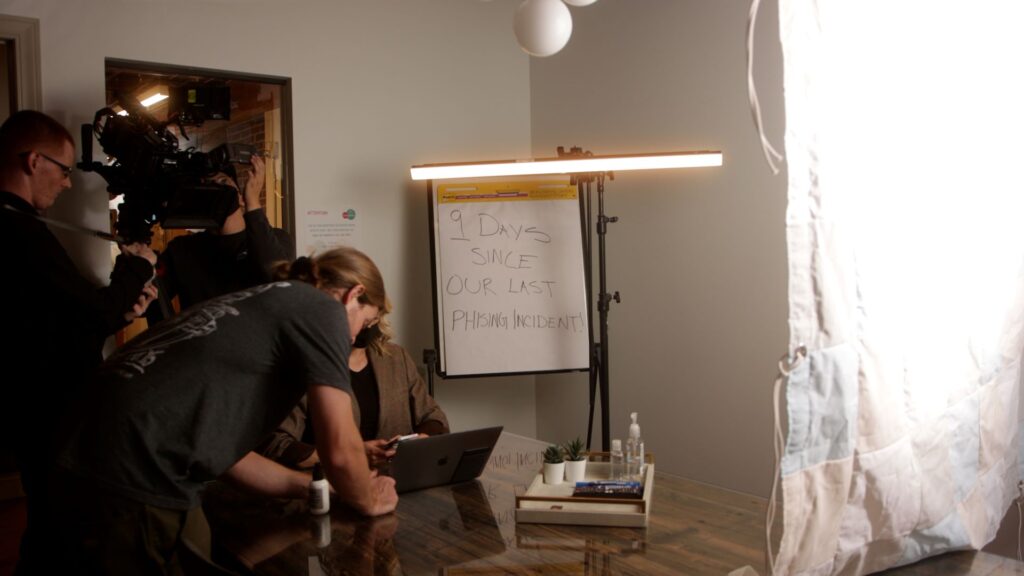
A Kelvin EPOS 300 bounced into a 2×4 beadboard gives us the fill we were looking for while staying off camera. The beadboard was put into place using a quacker clamp, platypus, duckbill, oinky boink, whatever they’re called where you’re from!
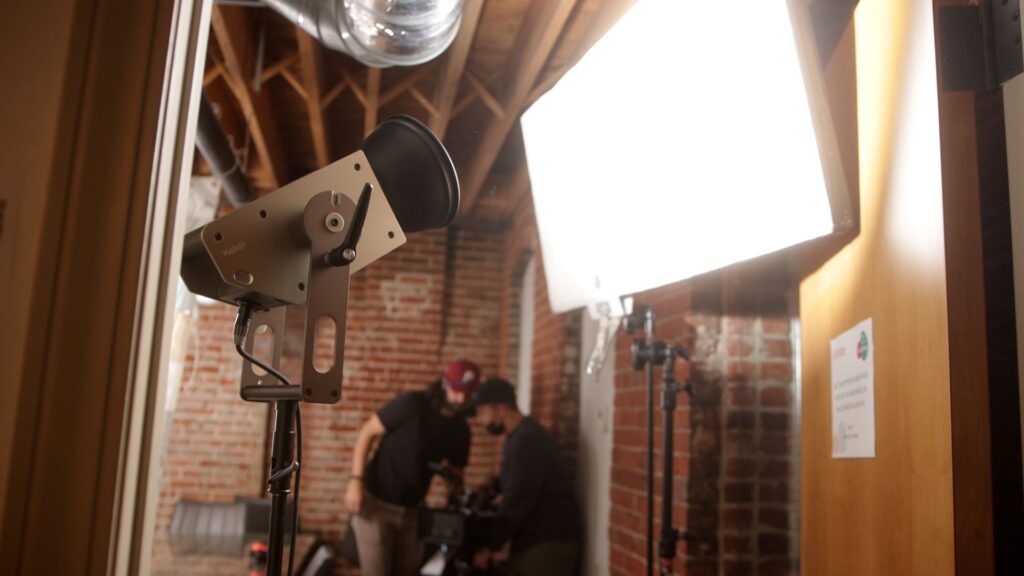
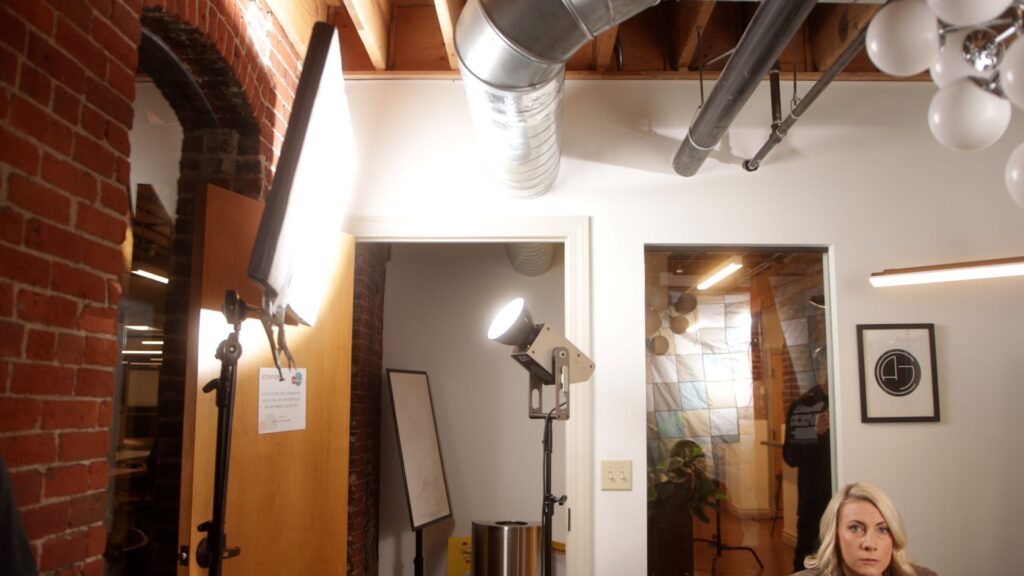
quick cut #3
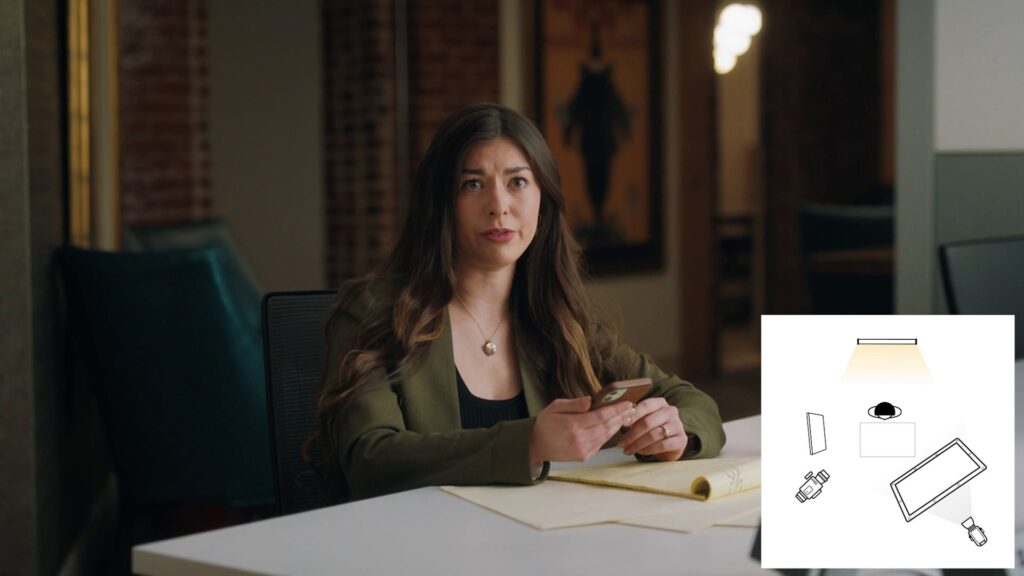
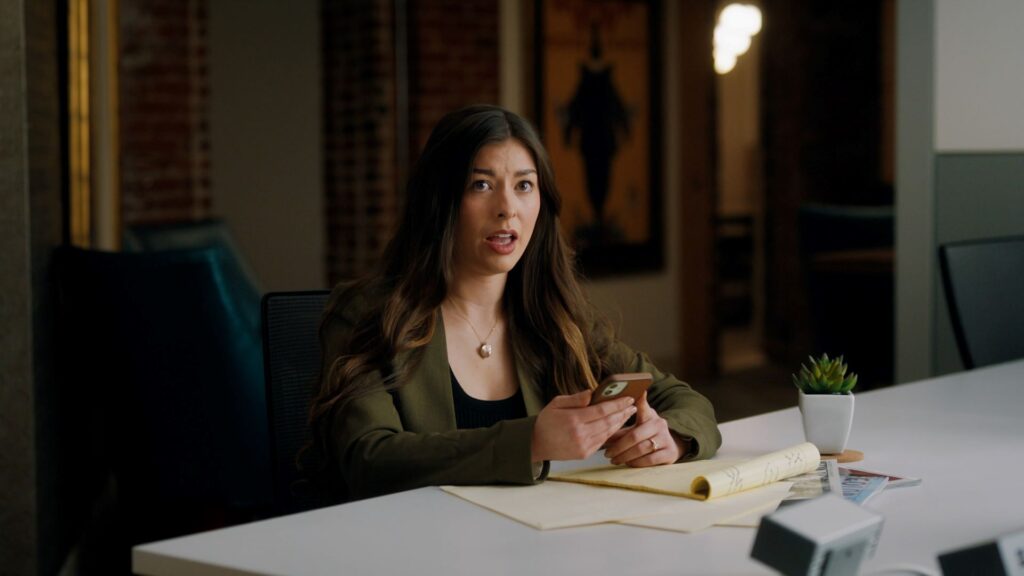
Onto the last of our quick setups – the key light here was an Aputure 600d Pro with the same CTO gel setup as before going through an 8×8 magic cloth on the far side of our talent. I didn’t even need the double net to slow down the desk since the cut happens before it would be seen!
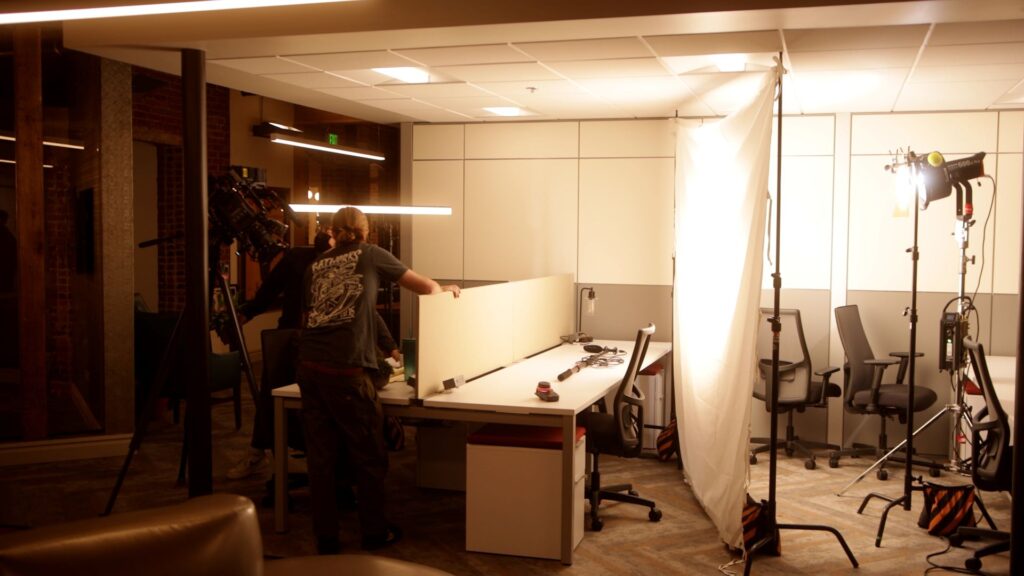
An Aputure Infinibar PB12 serves as a hair light, adding separation to the talent yet again!
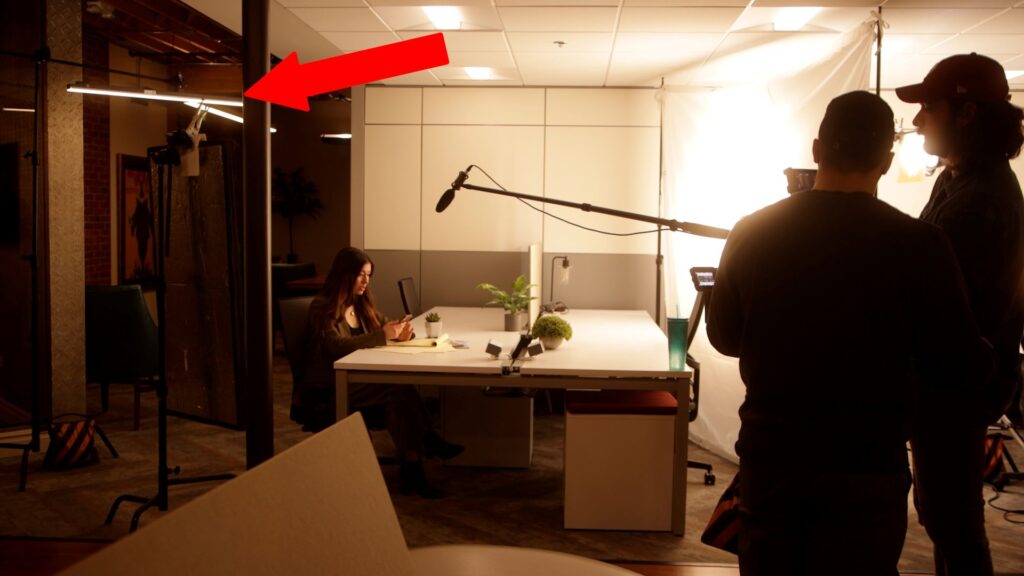
And that same bead board from before is still controlling the amount of shadow side fill. Only this time it’s affecting the ratio by bouncing the key back into our talent rather than re-directing a second light source.
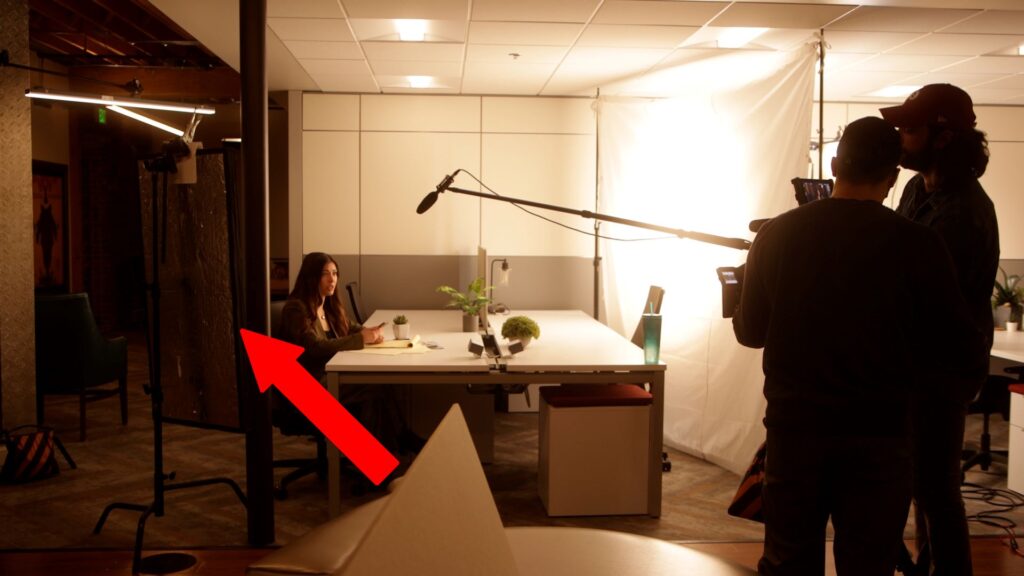
That does it for the quick cuts! A big soft key positioned far side, some separation between the talent and background when possible, and some quality acting!

room 3 breakdown
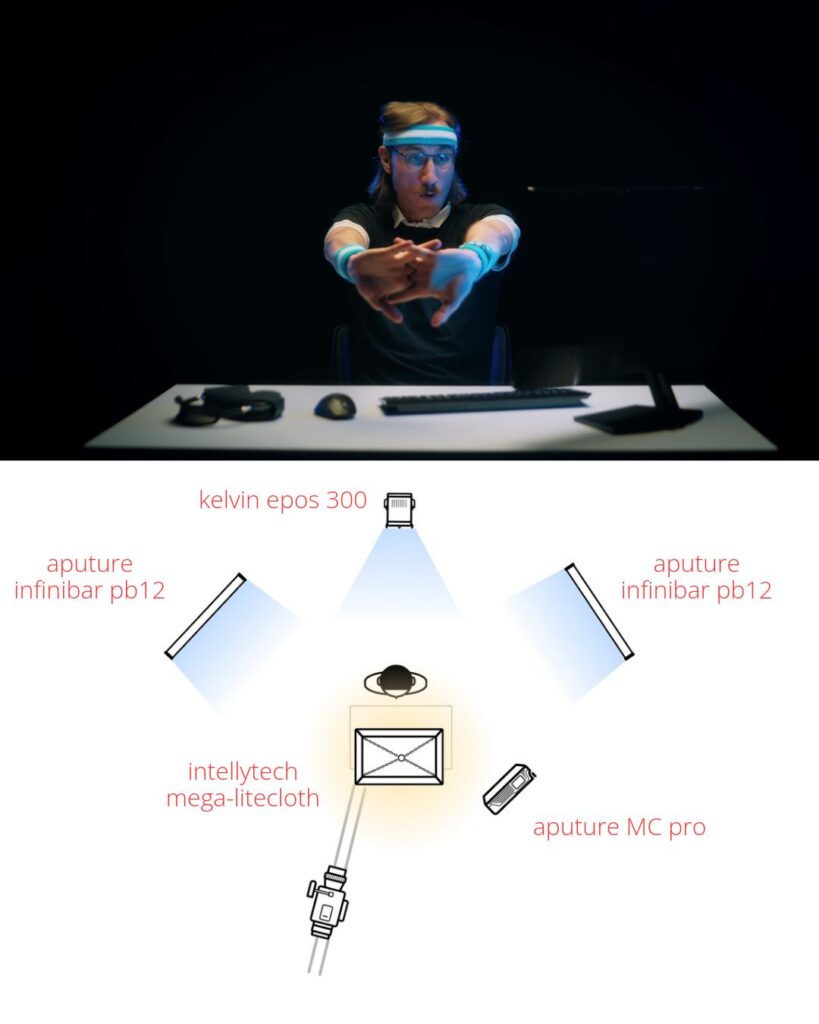
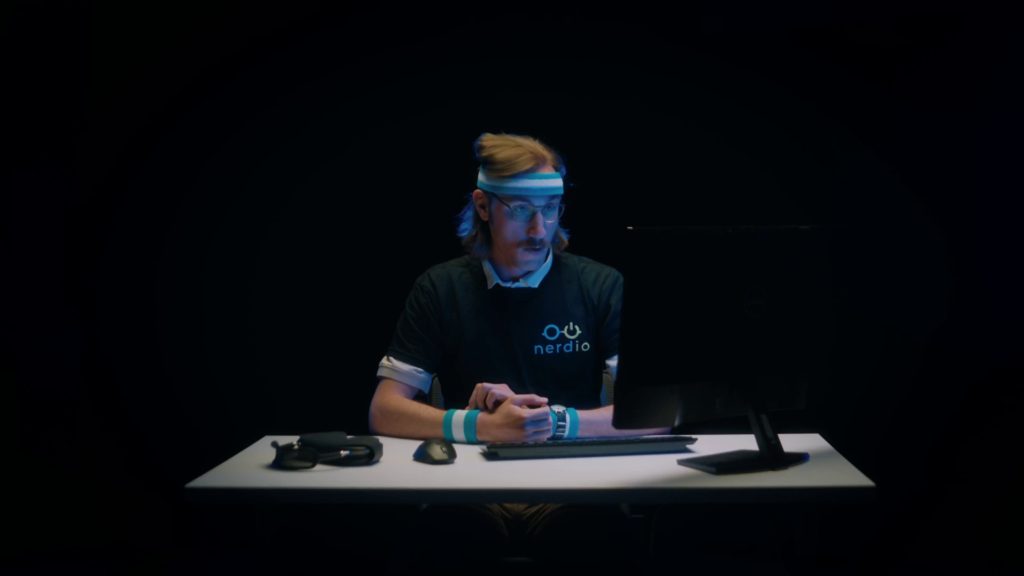
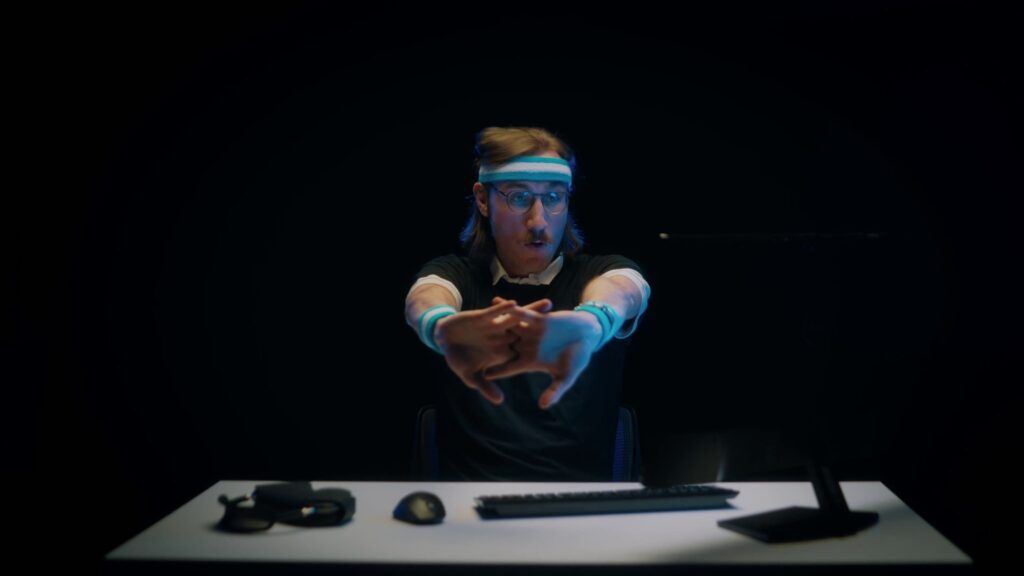
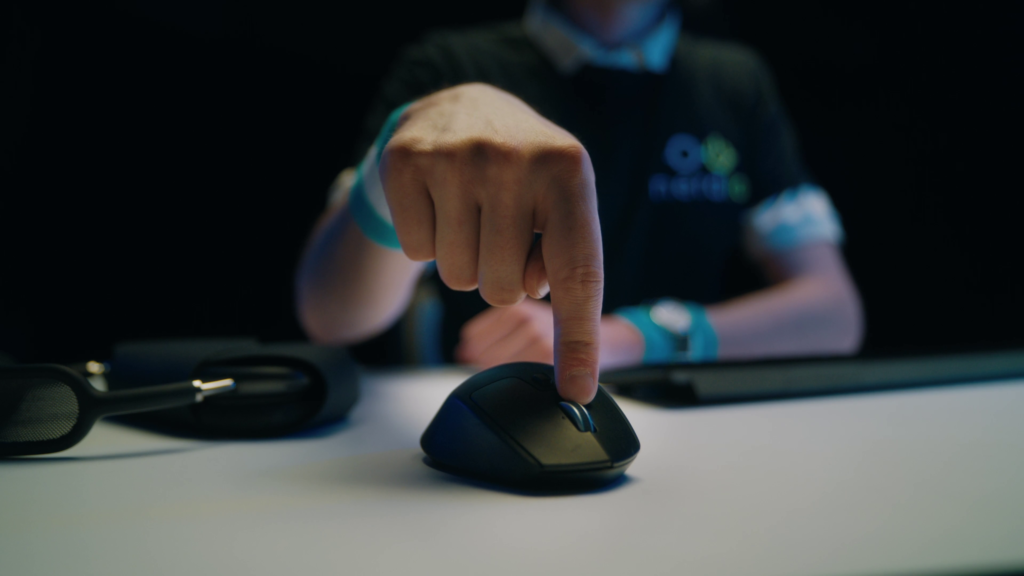
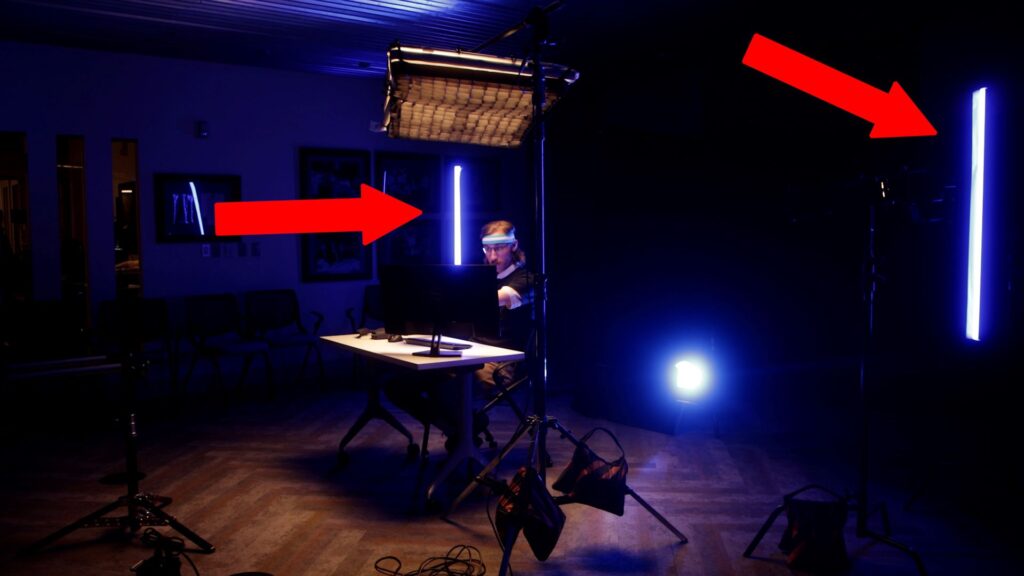
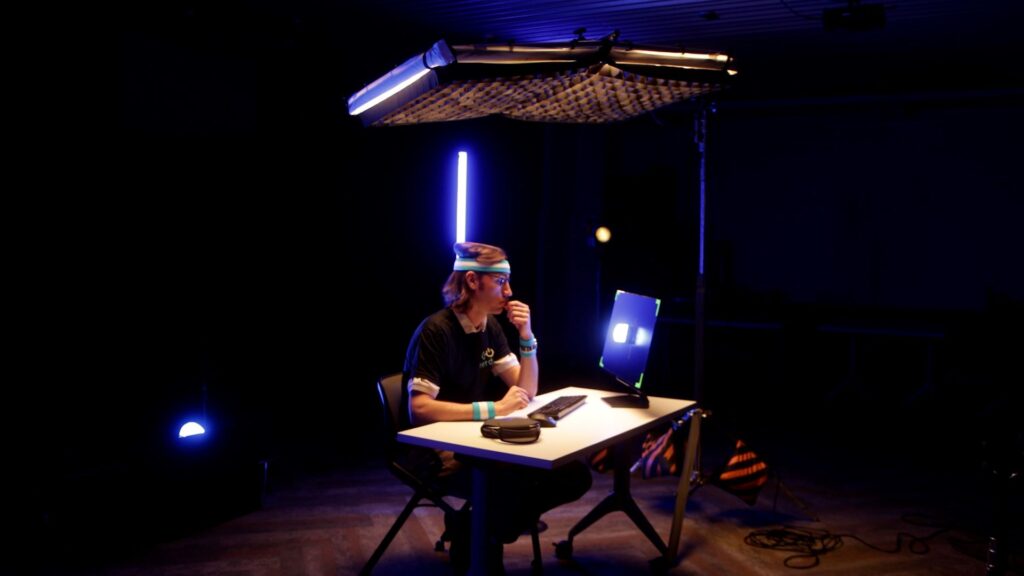
The last shot of the day was definitely my favorite scene to light! In order to create a ‘black void’ room, we had to film in a room with enough space to avoid spill from the lighting hitting the walls. While this shot could’ve been done in a smaller room, it would’ve been significantly harder to set up and control all the lighting.
 
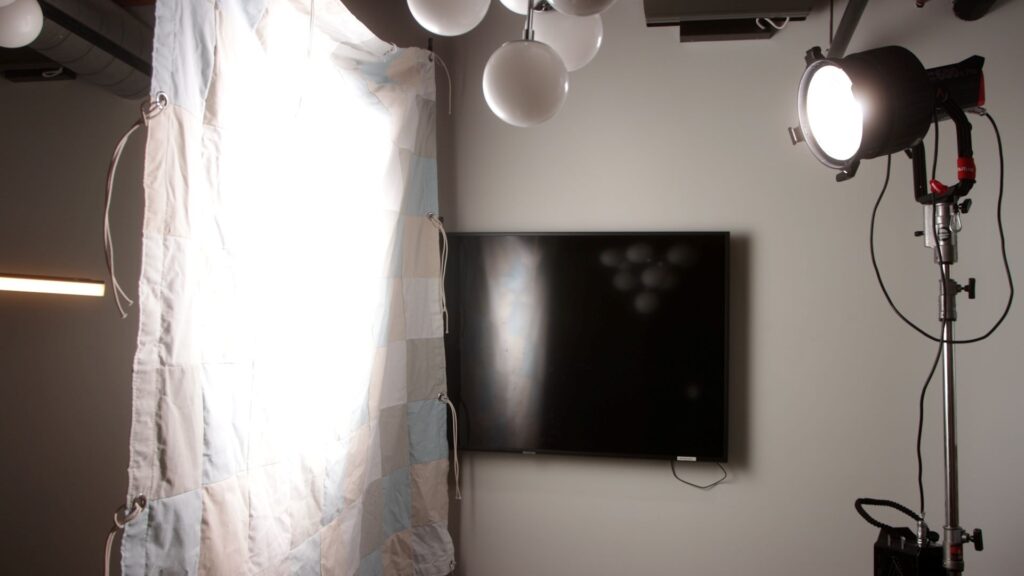
Second, all of the available light sources had to be blacked out. As you can see here, this room was flooded with light.
Several floppies outside the room and some duvetyne under the skylights helped bring it all under control.
 
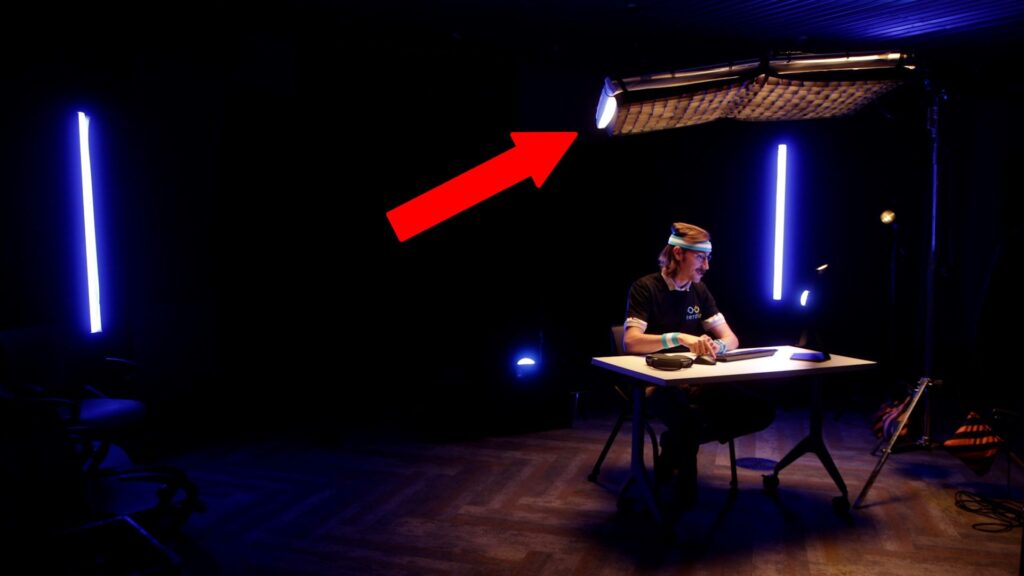
To start lighting this one, an Intellytech mega 8 was boomed in over our talent, and slightly in front of him. This was controlled with a grid to reduce the spill on the back wall. I placed the light slightly in front of the subject to eliminate the raccoon eye effect that can happen when overhead sources are too directly overhead.
Two tube lights were placed behind the talent on both sides of him to provide the blue rim lighting. A black piece of gaffers tape was placed along the back side of each tube to act as a flag and block the light from casting onto the back wall.
A point source was popped behind our talent on the floor using a pigeon plate to give him some real poppy background separation, and the spill onto his legs was controlled with a flag.
 
Lastly, an MC pro taped to a monitor simulated the light coming from said computer monitor!

outro

And there you have it! How I helped director AJ Campli and the Boulder Media House team go above and beyond to satisfy their client’s wishes!

connect

follow me

disclaimers

Some of the links in Tyler’s blog posts are affiliate links, which means that qualifying purchases will help financially support Tyler at no extra cost to you. If you wanted to purchase something else but still support Tyler, please use the following link: https://amzn.to/3WdnsdM

This blog post contains only Tyler’s opinions about G&E, gaffing, and LED lighting, and was not reviewed or paid for by outside persons or manufacturers
 
Tyler Trepod is a freelance owner/operator gaffer of a 1-Ton Grip & Electric truck based in Denver, Colorado and serves the Boulder, Denver, Colorado Springs, & Fort Collins markets